The braid out process
Now that you pretty much know what products you need let’s get into the process of the braid out. As a reminder, we mentioned that you should cleanse your scalp and hair in sections using a sulfate free shampoo* as well deep condition and detangle your sections before styling.
Depending on the look you are going for your sections should range from small to large, we want to have a pretty defined braid out so we recommend 6 medium sections to start.
Grab your first section, working from back to front and add your moisturizer or leave in to ensure that the hair is moisturized. You want the rest of the sections to retain its moisture so cover them up with a plastic cap to keep the hair from drying out.
If the section you are working with is too dry simply spray it with a little water before adding your leave in conditioner*.
Appy the leave in conditioner* and then apply your oil smoothing the section with your Denman brush* or detangling tool. The final step is adding your styler but we have to mention that if your hair is particularly dry you should add a butter or cream after the oil then add the styler.
This is called the LOC method and it will ensure that your hair remains perfectly moisturized all week long after the style sets. Use any creamy moisturizer or butter you have available or butter like the As I Am Double Butter Cream for instance.
Depending on the styler you choose they can be very drying so it is important to add the styler last after all the products we mentioned.
Use your Denman brush* to smooth the product through the section and then begin to braid. At the very end of your braid twirl the ends of your hair to set the ends and then repeat on all the sections of your hair. Some women use perm rods on the ends of the the braids so that the ends are smooth and uninformed. You can try this method as well!
The key to a successful set is allowing your hair to air dry completely or drying it under an overhead dryer. Once your hair is dry you can remove each braid one at a time carefully so that you do not cause any frizz.
Use a pick to lift the roots and give your hair some volume as you separate each section according to your own preference.
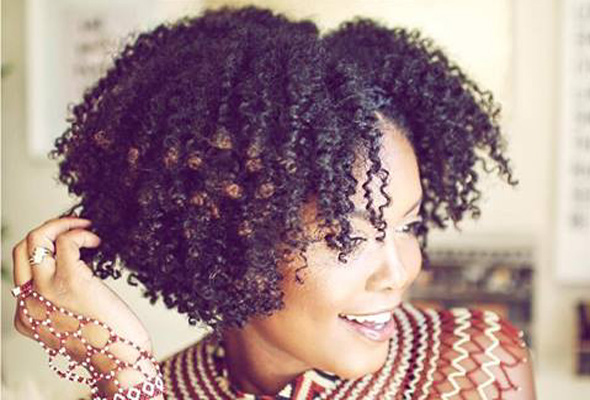
Examples of results on different textures
Now for the fun part! My braid out probably won’t look like your braid out even if we followed the same exact steps as described above.
Every texture is different so it is important to see or have an idea of what *your* results will be according to how your hair behaves. Below I will have 4 examples of women with different textures including relaxed hair as a guide for process and results.
4A Texture
Mini Marley appears to have a 4A texture which is similar to my own hair and in the below video she does a detailed bomb braid out tutorial using the first combination of products I described. Watch her video below:
4C Texture
If you have 4C hair it is very important that you do the LOC method before your styler so that your hair can remain very moisturized. In the below video Ambrosia Malborough demonstrates her braid out process from start to finish on her 4C natural hair. Check it out:
3C Texture
If your hair is 3C or a looser curl pattern then the only thing you have to do that is different is probably use a lighter styler or gel that has a light hold so that your curls are not weighted down with too much product. 3C curls can be just as prone to dryness as other textures so it is important that they are moisturized for successful results.
In the below video Youtuber JeweJewebee demonstrates how she does her braid out on her 3C hair from start to finish, watch below.
Relaxed hair
Last but certainly not least Relaxed hair! Braid outs on relaxed are a great option if you are trying to avoid using heat on your relaxed hair and you want a little texture added to your straight hair.
The process for relaxed hair is still very similar to that of natural hair using hydrating products and a styler to set the style as described above.
Like with 3C natural hair you do not want to weight down the hair with too much product and we would encourage you to use a protein based deep conditioner* when you deep condition your relaxed hair.
In the below video you will notice that the youtube braids the hair directly to her head first like a cornrow and then braids the length of her hair.
I love this technique because it will give the hair, even more, definition than just braiding straight down. She also adds perm rods* to the end which I strongly encourage for our relaxed haired girls. Perm rods* smooths the ends and gives the style a very playful look great for straight hair.
Watch the below video for Relaxed hair braid out inspiration:
In conclusion, this style is a great go-to style when all else fails and it is the signature style of many including myself. Comment below and let us know if you have mastered your braid out and what products you use.
I would like to see short pixie hairstyles